Like many other applications Visual Studio have a set of options and settings that work for all projects. We say that the settings are global. You find the global settings on the menu Tools -> Options.

This menu will show you this dialog box.

This dialog box contain several tabs grouping the functionality together. Please note the little two arrows in the top right corner, they let you scroll to the yet invisible tabs. You can set a lot of options in these dialogs, and I'll just cover some of them. Remember, much of options-setting are a matter of personal preferences, so you might set whatever you'd like.
In order to be able to compile and link Notes C and C++ applications, you must specify certain settings in Visual Studio. This subject covers the important - read; the ones you can't live without!
Maybe the most frequently visited tab on this dialogs are the Directories. In this dialog you set up the directories which Visual Studio will scan for files during compile. It has a couple of files set up as default, and you should not delete any of those. A later subject will discuss in detail one way to organize your toolkits and libraries. But for now, lets take a look a the include files drop down

The include files directories are where Visual Studio search for header files (*.h or *.hpp). These files typically define structures, classes and methods amongst other stuff. A toolkit typically consists of header- and library files, so when you install a toolkit as we will in the next subject, you need to tell Visual Studio where e you put the header files. This is done in this dialog.
From the dialog box above you see that I have specified where Visual Studio will find the header files for seven toolkits, where the latter three are Lotus-related!
Below you find the Library directories, after you selected Library files from the drop down.

Note that the directories here are not the same as for the include directories. They point to the directories where the library files (typically *.obj or *.lib) are located. Very often a toolkit consist of this directory pair, a include- and a library directory.
Remember that these options are global and go for all projects. If you want to set special include and/or library settings per project, that is also possible, but I wont cover that now!
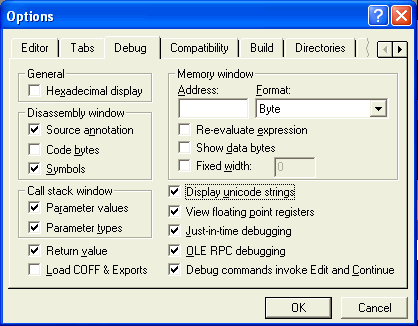
Below you see the options for the Debugger.

The debugger is a very advanced tool enabling you to find bugs (!) and step through your code. You can monitor any variable of internal structure of your application during execution.
The default options are usually quite adequate, but ensure to enable the Display unicode strings. This option will make it a whole lot easier to debug unicode strings!
This subject covers some cool modifications you ought to do with the Visual Studio IDE.
When you edit a file in Visual Studio, you often tab along to get the correct indenting of your code. Below is a sample of some indented code:
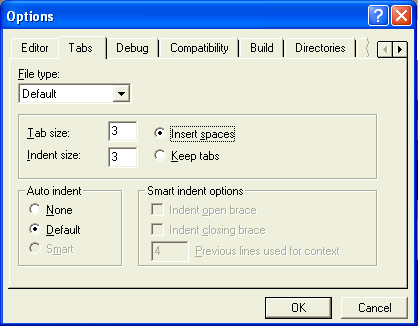
Some user don't like the code to contain the real tabulator character. This is especially true if the code is shared between more than one programmer. As we have discussed before most programmers like to have their own editor. Your team should therefore agree about spaces and tabs, so the code doesn't get completely reformatted for every programmer! Below is the dialog box for the Tabs

Select Insert spaces or Keep tabs for your choice!
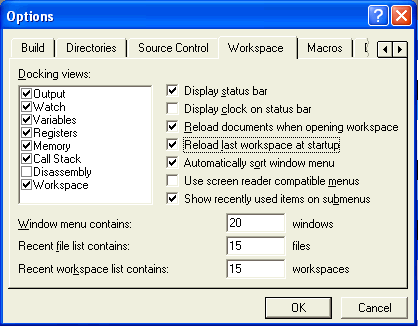
You start to get the feeling that you can define many options in Visual Studio ? Sure, here's more! If you are like me, I love applications to start with the previously project and files that I was working on. This can easily be done at the dialog of the Workspace (you need to use the arrows to get to this tab!):

I select the Reload last workspace at startup, and I also increase the numbers of Windows menu contains, Recent file list contains and Recent workspace list contains to the max!
You find a tab where you specify which Help system Visual Studio should utilize. You may also select which version.

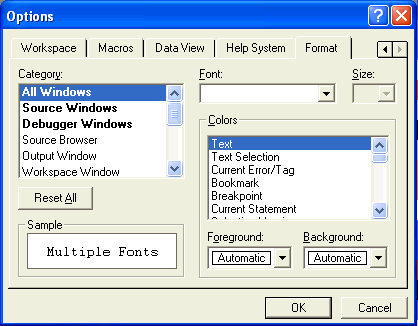
See the Format tab for all kinds of settings regarding fonts in Visual Studio.

The more I work with Visual Studio, the more impressed I become. The debugger has a feature where you can configure what- and how the content (ie. values) of variables and structures should be displayed. This is off course easier to explain with a couple of screen dumps. Below you'll find a screen dump from an debugging session, where I watch a set of variables and expressions.

Note that you see some of the values from the variables, such as iIndex1 and iIndex2. But many of the variables just show {???}. This means that Visual Studio hasn't been configured to display the values! You can however see some of the content by clicking on the small plus-signs to expand the variable, you that needs clicks!
Below you'll see the exact same debug session with modifications to AutoExp done!

Ain't that cool!! All of a sudden you can easily see the content of the variables, and you can even show the content of your own classes and structures!
How is this done ?
All this configuration is done in a text file with the name of AutoExp.Dat (I bet $0.02 that "AutoExp" is abbreviated for AutoExpand or similar!).
You find AutoExp.Dat in this directory if you selected the default directories during installation:
C:\Program Files\Microsoft Visual Studio\Common\MSDev98\Bin\AUTOEXP.DAT
This file has it's own structure, but if you follow the embedded guidelines, you can't go completely wrong. By doing the following two steps, you enable AutoExp.Dat to the level shown above
;stl string
std::basic_string<*>=<c_str(), st>
; Dinkumware 3.08 std::string
;std::basic_string<*>=<_Bx._Ptr,su>,<_Bx._Buf,su> (<_Mysize>)
;stl containers
std::vector<*>=size=<size(), i>, capacity=<capacity(), i>
std::map<*>=size=<_Mysize, i>
std::set<*>=size=<_Mysize, i>
std::list<*>=size=<size(), i>
std::deque<*>=size=<size(), i>
;stl pair object
std::pair<*>=first=<first>, second=<second>
;stl list iterators
std::list<*>::iterator=val=<_Ptr->_Myval>
std::list<*>::const_iterator=val=<_Ptr->_Myval>
; stl set iterators
std::_Tree<*>::iterator=val=<_Ptr->_Myval>
std::_Tree<*>::const_iterator=val=<_Ptr->_Myval>
;for iterators that can't directly be watched, give tip on how to watch them.
std::_Ptrit<*>=elem addr=<current>, place watch on *iter.current to see value.
std::_Ptrit<*>=elem addr=<current>, place watch on *iter.current to see value.
CTokenizerToken =value=<m_strValue.c_str()> delimiter=<m_cDelimiter>
The latter line show how one of my own classes are exposed. The m_strValue is a string member, and m_cDelimiter is a character.