This subject describes how you can create your own libraries and reuse them with greatest ease from project to project.
The main idea is to make it as easy as possible to create, maintain and use your own libraries. This implies a certain structure.
Below you see a suggested directory structure:
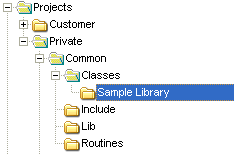
The important sub directory structure is from Common and below. Below Common you'll find Classes and Routines. Those two directories contain the class-based libraries and the procedural routines respectively. You see a sample class library with the name of Sample Library below Classes.
The grand idea here is that each library project is set up to move the result of the project, the header and library files, to the include and lib directories respectively. Since Visual Studio needs to know where to search for both include- and library files in it's global options dialog for directories, it is fairly easy to specify just one extra include directory (here it will be D:\Projects\Private\Common\Include) and one library directory (D:\Projects\Private\Common\Lib).
The header file will contain the commands that automatically enables the compiler to pick the correct library file (release or debug!).
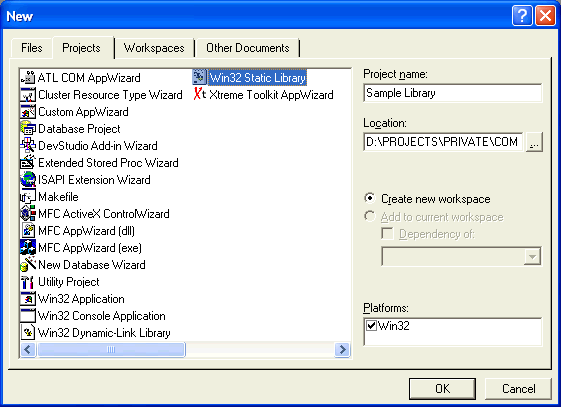
Ensure you select Win32 Static Library as project type
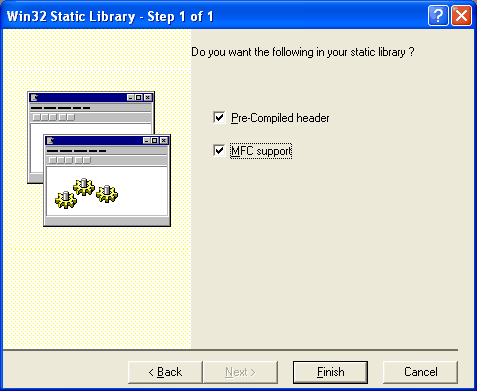
The settings here are very important!!! Bear in mind that all components involved in an application needs the same compiler- and link settings. So, if your main application (the one that will use this common shared library) use MFC, so should you, even if this library doesn't do a thing with MFC. This is important!
The support for pre-compiled headers speed up the build process, but fill up your hard disk. I tend to run it on, if the main applications has it turned on. You don't want different settings!
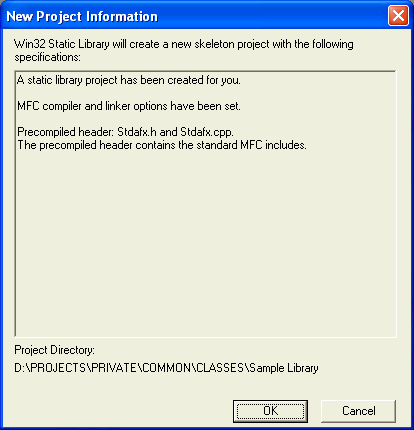
Press Ok and you're ready to build the project workspace.
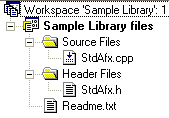
The StdAfx.h and StdAfx.cpp are system generated files, for the pre compiled header support in the previous steps.
This step is important so you keep the settings of the main project and your library the same.
Tell the linker to move the result (the library file) to the common lib-directory
In order to get our global directory logic to work, we need to overwrite the default suggestion in the Output file name field. Change the directory path to the following: ..\Lib\ This ensures that the linker put the result of this build in the common Lib directory as shown in the directory structure above! The next point is to ensure that the debug-build has a suffix D to it's library name. In the sample above, the debug-build library name is: Sample LibraryD.lib Why ? Because the release build will only have the name, Samle Library.lib (No D!). Remember that you easily switch to the release build settings by changing the Settings For field. |
Since we have a debug- and release build of our library (Sample LibraryD.lib and Sample Library.lib respectively), we need to somehow tell the compiler what version to use. The absolutely best way to do this, is by the use of pragma (compiler directives, or commands). Somewhere in your header file, include this couple of lines:
#ifdef _DEBUG
#pragma comment(lib, "Sample LibraryD.lib")
#else
#pragma comment(lib, "Sample Library.lib")
#endif
If you read the above lines carefully, it should interpret to something like this; "If we are building a debug-build, then use the Sample LibraryD.lib, otherwise use the Sample Library.lib".
Somewhere in the main application (the one that use this library), you will typically find something like:
#include <Sample Library.h>
Since we use the angel-brackets, you tell the compiler to use the so-called system include directories, which we have specified in the global directories! And, since we placed the header file above in the common Include-directory, Visual Studio will find the file. And - finally due to the pragma directives, the linker knows which library, either debug- or release, to use, completely automatically!
Beautiful!